Dust, heat, loose fittings and electrical faults can shorten the life of a dining fixture, while careless cleaning can damage finishes or the table below. You will learn how to clean each material, inspect the fitting safely, protect your room during maintenance, and identify the point at which a licensed electrician must take over.
Key takeaways
- Switch off the breaker before cleaning or inspecting a dining light.
- Use dry microfiber on dust and material-safe products on fingerprints.
- Stop using fixtures with scorching, loose parts, flickering, or exposed wires.
- Call an electrician for repeated faults, damaged wiring, or uncertain isolation.
Build a Safe Cleaning Routine Around the Dining Table
Isolate power at the wall switch and circuit breaker before cleaning; a switch alone does not remove every electrical risk. Clear the dining table, place a stable ladder on the floor, and never balance on chairs. Dust the fixture weekly with a dry microfiber cloth, then use a barely damp cloth for fingerprints every month.
Keep water away from sockets, lamp holders, drivers and cable entries, and allow every surface to dry completely before restoring power.
Knowing how to maintain luxury lights above a dining table means matching the cloth and product to the finish:
- Glass: use a barely damp microfiber cloth; do not spray cleaner onto the fixture.
- Crystal: dust gently and support hanging pieces so their fittings do not carry side force.
- Metal: wipe dry after cleaning; avoid abrasive sponges.
- Painted finishes: use diluted mild soap only, because scrubbing can remove the coating.
- Plated finishes: use a dry or barely damp cloth; ammonia-based glass cleaner can damage the plating or protective coat.
- Fabric shades: vacuum with a soft brush attachment; do not saturate the fabric.
- Acrylic: use a clean microfiber cloth; abrasive cleaners can leave permanent scratches.
During dining light maintenance, check the ceiling canopy, suspension cable or rod, cable strain relief, lamp holder, diffuser, screws, visible corrosion, loose fittings, flicker, buzzing and heat marks. Do a visual check monthly, clean monthly, and arrange an electrician’s inspection for damaged wiring, recurring flicker, buzzing, heat marks or movement.
Do not tighten electrical parts or rewire the fixture yourself.
Match the Cleaning Method to the Fixture Material
Switch off the circuit at the breaker, let lamps cool, and dust the fixture weekly with a clean microfiber cloth. Use a barely damp cloth only for marks, then dry immediately. Keep water away from sockets, lamp holders, cable entries, and the canopy; excess moisture can cause corrosion or an electrical fault.
This is the foundation of luxury dining fixture care.
| Material | Safe method | Avoid |
|---|---|---|
| Glass | Wipe with microfiber and diluted mild dish soap; dry with a lint-free cloth. | Abrasive pads and liquid running into sockets |
| Metal | Dust dry, then use a barely damp cloth with mild soap; dry fully. | Abrasive sponges, metal polish, and ammonia-based glass cleaner on coated metal |
| Fabric | Remove dust with a soft brush or upholstery-vacuum attachment; blot isolated marks with a nearly dry cloth. | Saturating the shade, soaking seams, and bleach |
| Acrylic | Use lukewarm water, mild soap, and a soft microfiber cloth; pat dry. | Ammonia, alcohol, solvents, paper towels, and scratching |
| Crystal | Dust gently; for grime, use lukewarm water with a small amount of mild soap and dry each piece. | Hot water, abrasive cleaners, and twisting hanging parts |
| Painted finish | Wipe with dry microfiber or a barely damp cloth and mild soap. | Scrubbing, wax, and solvent cleaners |
| Plated finish | Dust dry; use minimal moisture for marks and dry straight away. | Polishing compounds, ammonia, and prolonged dampness |
For luxury lights dining care, test any cleaner on a hidden area first. Never spray the fixture directly; spray or dampen the cloth instead. A dry final wipe prevents water spots and protects delicate coatings.
Inspect the Fitting Before a Small Defect Becomes a Failure
A 30-second visual check each week catches movement, heat damage and loose parts before they become a dropped fitting or electrical fault. Switch the light off and isolate its circuit at the breaker before touching, cleaning or testing anything.
1. Check the ceiling canopy monthly. Look for a gap against the ceiling, movement, cracked cover, loose screws, heat marks, visible corrosion or a cable strain relief that has pulled out of position. Do not tighten canopy screws if the fitting moves or the cable enters the enclosure incorrectly; ask an electrician to inspect it.
2. Examine the suspension cable, chain or rod monthly. It must hang straight, remain firmly secured and show no fraying, kinks, rust, bent joints or stretched fittings. A heavy fixture that has dropped even slightly needs professional assessment.
3. Inspect the lamp holder and diffuser every month with the power isolated. Look for discolouration, melting, cracking, looseness, buzzing or a lamp that sits at an angle. Stop using the fixture for flicker, scorch marks or a hot socket.
4. Inspect visible glass, crystal, acrylic, fabric and metal surfaces during weekly dusting and after cleaning. Record chips, hairline cracks, loose trim, chipped paint and new corrosion; a cracked diffuser or loose decorative part can fall above the table.
This dining light maintenance schedule supports luxury dining fixture care without encouraging unsafe rewiring. Have an electrician inspect the fitting annually, or immediately after repeated flicker, buzzing, overheating or a failed mounting point.
Recover a Dining Light After a Fault Without Guessing
A breaker that trips twice is not a reset problem. To recover a dining light after a fault, isolate power at the switch and consumer unit, then check only what is visible and reachable without removing the canopy, holder, driver or wiring.
- Reset the breaker or RCD once with dry hands. If it trips again, leave it off and call an electrician.
- Replace a failed lamp only after power is isolated. Use the specified cap, voltage, wattage and lamp type; a higher-wattage lamp can overheat the holder.
- For flicker, confirm that the lamp is fully seated and that the dimmer is rated for that lamp and its minimum load. Do not continue testing an LED on an incompatible dimmer.
- For buzzing, switch off and listen for whether the sound stops. Persistent buzzing, crackling or vibration requires inspection rather than tightening screws yourself.
- For complete loss of power, check the breaker, RCD and wall switch once, then compare another light on the same circuit. Do not remove the fitting to trace the fault.
Stop using the fixture immediately if you see scorch marks, melted plastic, exposed copper, corrosion at a connection, smoke, sparks, water near a socket or a loose canopy or suspension cable. A burning smell or repeated flicker also disqualifies further use.
Knowing how to maintain luxury lights above a dining table includes recognising when observation is safe and diagnosis is not.
Know When Maintenance Requires an Electrician or Replacement Part
Stop using the fitting and call a licensed electrician for exposed wires, heat marks, repeated breaker trips, buzzing, burning smells, damaged insulation, loose ceiling anchors, rewiring, or any work inside the canopy. Do not tighten terminals or replace a mains driver while the circuit is live.
A professional must also test earthing, polarity, insulation, and dimmer compatibility after installation.
Confirm these details before ordering a part or booking service:
- Replacement fixture: ceiling-box load rating, mounting-hole spacing, fixture weight, supply voltage, earthing point, cable length, and included hardware.
- Lamp: cap type, voltage, wattage limit, LED compatibility, colour temperature, dimensions, and dimmability.
- Driver: input voltage, output voltage or constant-current rating, wattage range, physical size, connector type, and dimmer compatibility.
- Dimmer: LED load range, trailing-edge or leading-edge type, neutral-wire requirement, and compatibility with the exact driver.
- Installation service: electrician’s licence, isolation procedure, ceiling-support method, testing included, workmanship warranty, and disposal of the failed part.
| Item | Confirm before purchase | Reject when |
|---|---|---|
| Fixture | Weight, support, voltage, earthing | No mounting or safety data |
| Lamp | Cap, wattage, dimensions, dimming | It exceeds the holder rating |
| Driver | Output current or voltage, wattage | Ratings do not match the LED board |
| Dimmer | Load range and driver compatibility | Flicker or buzzing is reported |
If the original model is from Kimika Lights, give the electrician its model number and photograph before ordering; this helps recover dining light after fault without fitting an unsafe substitute. That is practical luxury lights dining care.
Related products
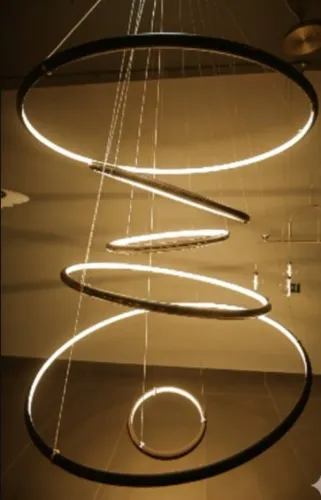
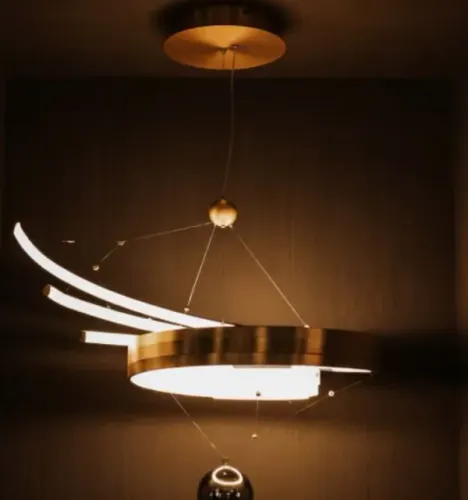
 | Dining Lights – I – Crafted for Elegant Dining Ambience Dining Lights – I – Crafted for Elegant Dining Ambience Dining Lights – I from Kimika Lights brings warmth, charm, and sophistication to your dining space. View product → |
 | Dining Lights – III – Sophisticated Illumination for Modern Dining Dining Lights – III – Sophisticated Illumination for Modern Dining Dining Lights – III from Kimika Lights offers a perfect balance of style, warmth, and contemporary elegance. View product → |
Frequently asked questions
How often should you clean a luxury light above a dining table?
Dust the fixture weekly with a dry microfiber cloth and remove fingerprints monthly with a barely damp cloth after isolating power.
How should you clean different dining light materials?
Match the method to the finish: use a dry or barely damp microfiber cloth for metal, avoid soaking fabric shades, and follow the manufacturer’s instructions for crystal or glass.
What defects require immediate attention on a dining light?
Stop using the fixture for scorching, flickering, buzzing, loose components, cracked shades, exposed wires, or a burning smell.
How do you recover a dining light after a fault?
Isolate the circuit, record what happened, check the lamp and visible connections without touching live parts, then arrange professional testing before restoring use.
When should an electrician replace a dining light part?
Use an electrician for damaged wiring, repeated tripping, uncertain circuit isolation, failed drivers, overheated components, or any repair inside the fitting.
Related products
 | Dining Lights – IV – A Touch of Minimal Luxury Dining Lights – IV – A Touch of Minimal Luxury Dining Lights – IV by Kimika Lights embodies refined simplicity with its clean lines, soft illumination, and contemporary elegance. View product → |
 | Dining Lights – II – Modern Warmth for Inspired Dining Dining Lights – II – Modern Warmth for Inspired Dining Dining Lights – II by Kimika Lights blends contemporary design with soft, ambient illumination to create the perfect dining experience. View product → |
 | Dinning Lights Kimika Lights brings refined simplicity and warm illumination to any interior. View product → |
 | Table Lamp Kimika Lights offers a refined blend of modern style and functional illumination. View product → |
Keywords